appetizer, Food, snack

Spaghetti Squash baked seeds

Oven Baked Butternut Squash Seeds
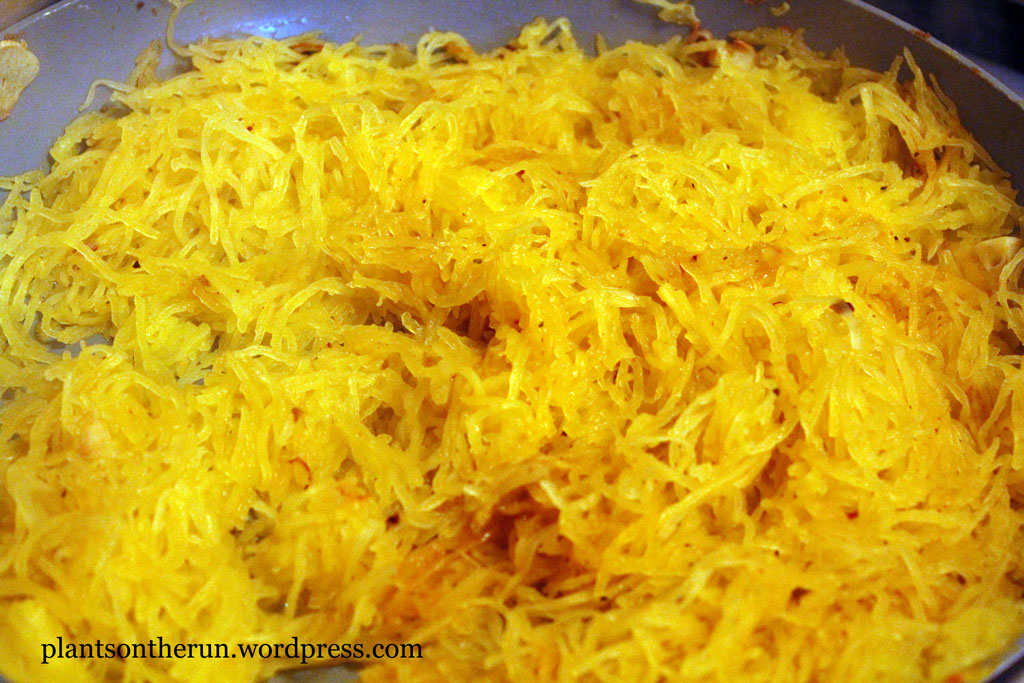
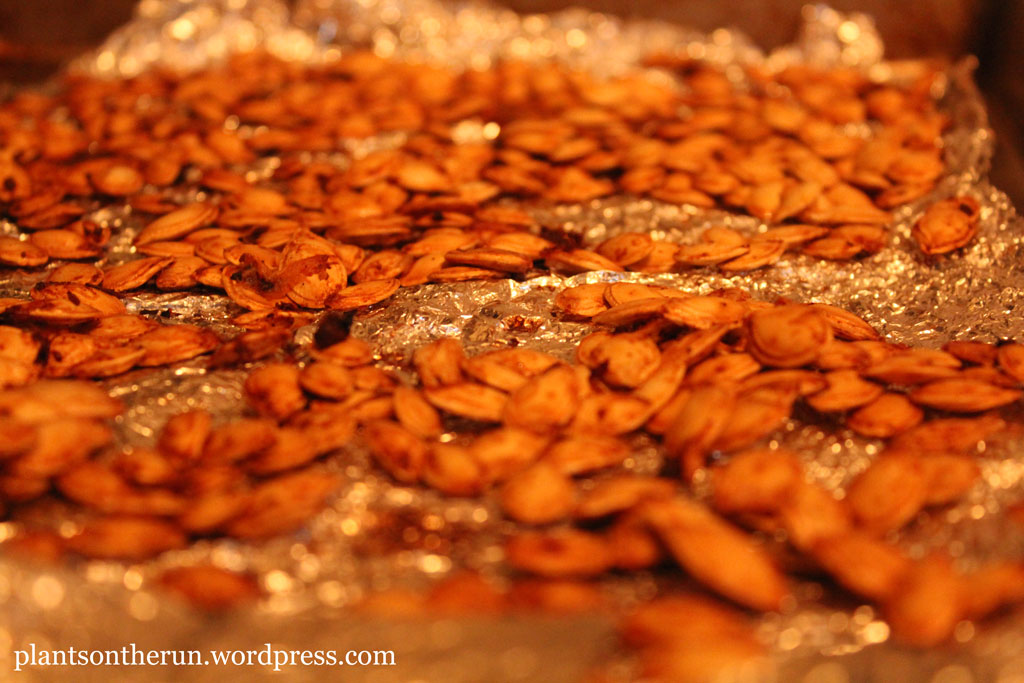
After cutting open the spaghetti squash I realized how similar this inside was to a pumpkin.  The recipe I was using to prepare the spaghetti squash said to scoop out the seeds and discard, but like a long tradition of using every corner of a napkin before you get a new one, I thought there had to be something interesting i could do with the seeds.

When we were younger while we were carving our jack-o-lanterns we’d take the seeds from inside the pumpkin, lay them flat on a cookie sheet, rub them in olive oil, sprinkle with lawry’s salt, bake for 20 minutes then enjoy.  We’d keep them in a cup on the counter and between my sisters and my mom they didn’t last long.

When you go to the store there’s always bags of pumpkin seeds baked, salted and sold $3 for 5 oz’s but you never see any squash seeds. The recipe I used for the spaghetti squash told me to throw the seeds away, but I couldn’t bring myself to do that.

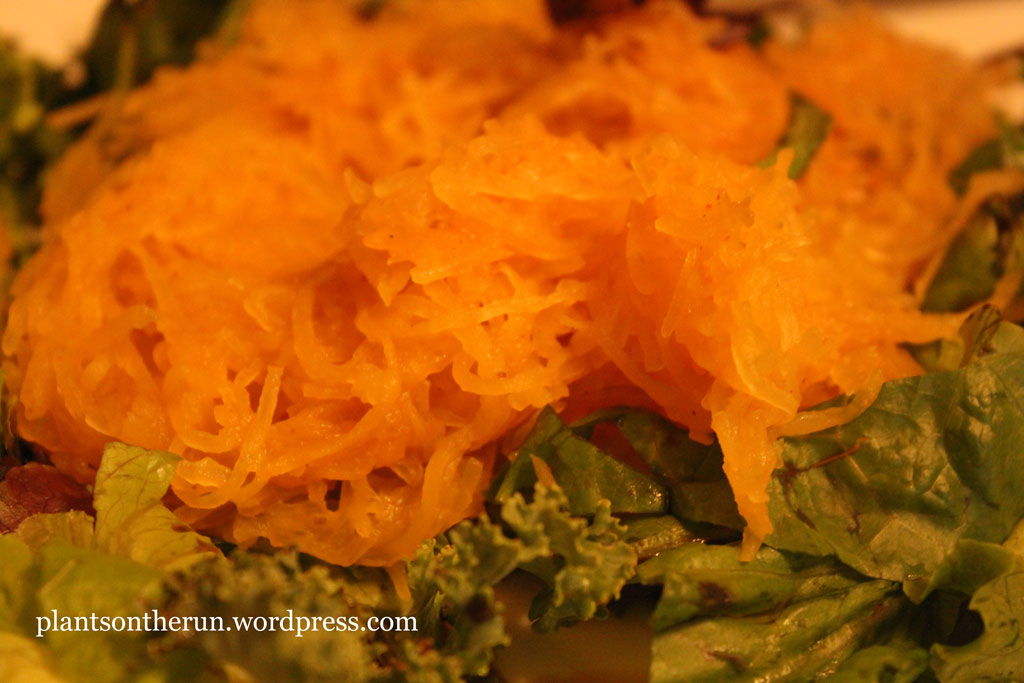
What a pleasant surprise.

I coated them in olive oil, sprinkled them with dried chipotle & smoked salt seasoning, baked for 20 minutes and ate them while they were tying to cool on the cookie sheet.  For what I can tell these taste just like pumpkin seeds.  So if you do find yourself using the spaghetti squash PLEASE don’t throw away the seeds.  Just bake them and eat them for a delicious snack! You could always turn them into a pesto if you really wanted…

INGREDIENTS
spaghetti squash seeds
lawry’s or other seasoning salt to taste
olive oil (or your preferred oil) to evenly coat seeds

Coat the seeds evenly with oil and seasoning. Bake for 25 min at 350. Try to let them chill but you’ll most likely eat them straight from the cookie sheet.

Standard
dinner, Food

Roasted Spaghetti Squash with Seasonings

spaghetti squash sauteed
Another week with the glorious CSA, another vegetable I’ve hardly ever cooked.  This time it’s spaghetti squash.

Although I’ve eaten the stuff I’ve never actually prepared it.  It was somewhat difficult to cut it open, but with some love and a sharp knife I was able to make it happen.  The cool thing about spaghetti squash is that after warming it up in the oven (or possibly some other way) you can take a fork to it and pull the inside out like actual spaghetti (OH, that’s why they call it that!). Since I’m not entirely on the gluten-free band wagon but trying-to-cut-out-white-flour-to-help-cut-out-calories this was a delicious alternative to actual spaghetti.

Using this recipe from “and then I cooked” as a base, I basically prepared it similar until the spices and the discard part.  Please save your spaghetti squash seeds for a nice snack.

Since this was my first time cooking with spaghetti squash I wanted to get a good understanding of how it tastes, etc so I know what to do with it.  I nuked it for 8 min, baked it for about 20 min, forked out the spaghetti guts then sauteed it with butter, coconut oil & garlic.  Although she called for cooking it in only butter, I figured I’d just use about a tsp of it for flavor mixed with the healthier coconut oil.  If you’re gonna Paula Deen it up by all means use a half stick, I’m just trying to watch my calorie intake.

This kind of reminded me of tofu, where it has a fairly neutral although ‘gordy’ flavor, it takes on the spices very well.  I can see this used with taco seasoning or the like for some squash tacos, etc.  Hmm…

I had 2 squashes so I seasoned them differently, so, season to your liking, but below is what I did.

spaghetti squash salad

INGREDIENTS
1 whole spaghetti squashed.  Roasted, then fork out the guts
2 tbsp no salt seasoning to taste, mix all over
1 tsp butter for frying
1 Tbsp coconut oil for frying
garlic for frying to taste

First nuke in the microwave or possibly the oven for 8/10 minutes.  Scrape out the inside then scoop onto a skillet with coconut oil or butter if you’re into that sort of thing.  Saute until golden, golden brown.  Place on a salad or eat straight up.

*I’ll figure out the pictures soon enough.

Standard
Food

Mac & 4 Cheese

mac & 4 cheese

mac & 4 cheese

Who doesn’t love mac & cheese?

For me, I have memories of back in the day at a friend’s house eating multiple bowls of some MSG filled orange/yellow type cheese stuff, that I’d scarf down like I was trapped in a desert for weeks and haven’t seen food since I left on the journey.

Once I was old enough to make it myself, but not smart enough to know better, I’d make my own box of bright orange/yellow cheese like substance and load it up with Sriracha or chipotle tabasco and eat it until there was just a milky residue left at the bottom of my bowl.

We bought some a few weeks ago, at you guessed it, and still have the boxes staring me in the face when I kneel down to figure out what I want to eat on those late nights (link to drunken food lament) and this Friday I decided to make some.

As this blog evolves more stuff will be made from scratch, but for now I like taking something that was about 60% made for me, then add to it. This time I had gorgonzola, gouda, goat & regular box organic dried cheese to add to the mix.   Since I don’t like just eating senseless calories with white flour & cheese I added some ‘normandy style vegetables’ steamed, and then mixed with the finished cheeses and consumed with my chipotle hot sauce*. Delish.

INGREDIENTS
2 boxes of mac (from basic store bought mac & cheese, although basic quinoa basic pasta would be best, only 1 cheese packet if box pasta)
1 packet mac & cheese cheese.
1/4 c shredded gouda
1/2 c blue cheese/gorgonzola
1/4 c goat cheese
1/2 c almond milk
3 cups vegetables of choice
curry spice, onion & garlic to taste

*I try to watch my sodium and salt intake, but there are some things that I HAVE to eat some type of salt. Mac & cheese & popcorn are 2 of those definite things. In addition to penzy’s smokey mixed salt, I prefer some type of hot sauce, and in this case my chipotle hot sauce. The only boundary that my hot sauce addiction knows are cereal & ice cream, other than that I think I’ve basically put hot sauce on everything else.

Standard
Food

Roasted Garlic

Our summer came a little late this year. We had an amazing June, July, and first half of August. But the humidity is out now and the air is thick. It makes for very inconsistent running. Because I can’t always pick and choose the days and times I run, I have to just suck it up and run. When its this hot out, I do have to take some precautions and plan accordingly. Here are my tips for running in the heat:

1. Choose routes with the most shade

2. Wear sunscreen and a visor

3. Keep runs to about 30 minutes. If running longer, make sure you take a water bottle with you

4. Have a cold water bottle ready for when you’re finished

When its this hot, I also don’t like turning on the oven. I do, however, make an exception when I run out of my roasted garlic. I make this stuff in batches because I’m not a fan of my fingers smelling like garlic anytime I want to add some flavor to my meals. Plus, I don’t have the time to go through all that chopping and mincing every time I cook. I first came across this recipe from Rachel Ray. I was working and B was watching some Rachel Ray. She was making Roasted Garlic Chicken. I roasted the garlic and he made the chicken, but I ended up loving the roasted garlic recipe and I only have to make it once every couple of months!

Roasted Garlic

Ingredients:

As many garlic heads as you’d like

garlic

olive oil

salt

1. Preheat oven to 400 degrees F

2. Cut off the tops of your heads of garlic

IMAG0476

3. Wrap each head  in a square of aluminium foil and drizzle with a bit of olive oil. Salt if desired.

IMAG0477

4. Place all of the garlic “pockets” in a pan or directly in the oven.

IMAG0478

5. Bake in the oven for 45 minutes or until tender. Enjoy the smells!

6. When garlic is tender, take out of oven and let cool. Squeeze the garlic out of its skin.

2013-09-01 11.17.14

2013-09-01 11.30.32

7. Use a fork to mash the garlic into a paste.

2013-09-01 11.31.29

8. Store in an airtight container in the refrigerator and use when needed!

2013-09-01 11.40.13


I love adding this to my sauteed veggies or into pasta sauces. It is also delicious just spread on some bread and drizzled with olive oil and warmed in the oven…

Enjoy!

F

Standard
dinner, Food

Blue Cheese Stuffed Tomatoes

Blue Cheese Stuff Tomatoes
As I’ve mentioned before, the love of my life & I are members of our local CSA. Sometimes we’ll receive 10 ears of corn, and other times we’ll receive 20 heirloom tomatoes.

Well, this was one of those tomato times.

They were sitting on our counter in a brown paper bag trying to ripen and I was wondering what to do with them. I’ve always had this ‘romantic’ idea of cutting the top off of peppers or tomatoes and stuffing them with something.

Tonight was the night.

We had the cheese thanks to Costco, as well the bread crumbs and other spices.

Just to make sure I wasn’t completely off of my rocker, I borrowed heavily from Grill Grrrl to make them.

From experience I know my dear loves garlic and onions, so after scooping out the tomato ‘meat’ i threw in a layer of garlic & onion at the bottom of the tomato, then added blue cheese/gorgonzola, bread crumbs & basil to ‘taste’.

Since I have more basil than I know what to do with after baking for 20/30 min I added fresh basil diced to the top of these before serving.

INGREDIENTS
4 Tomatoes
1/4 cup blue cheese/gorgonzola
1/8 bread crumbs
1/8 garlic
1/6 diced onions
basil to taste

Standard
Food

Tomato Hummus

tomato hummus

tomato hummus

Hummus is a wonderful treat to have before a meal, during a meal spread on a sandwich or wrap, or after a meal while you’re watching a movie.  It’s an easy snack to have in the middle of a party and your guests can dip mixed veggies, pita, chips, etc into it.  Of course be careful for the double dippers.

I used to buy hummus all the time, but after figuring out how easy it is to make it on my own I love throwing a can of chick peas into the small food processor with the spices of my choice, letting it chill for 15 minutes and enjoying with the aforementioned snacks.

Tonight I was making blue cheese stuffed tomatoes, a recipe to be posted later.  After scooping out the insides of the tomatoes and replaces with most of the ‘meat’ of the tomato, I still had the tomato juice & seeds left over.  I combined those with a can of dried chickpeas, handful of onions, 1/2 clove of garlic, tumeric, paprika, cumin, basil & olive oil for a quick snack.

tomato hummus, pre processed

INGREDIENTS
1 16oz can Chick Peas
1 small handful diced white onion
1/2 clove garlic
1/4 – 1/2 cup tomato juice, seeds
1 Tbsp olive oil
fresh basil leaves, cumin, tumeric & paprika to taste

blend & chop in the food processor until it has a smooth paste texture.  Put in the refrigerator to chill.

Standard